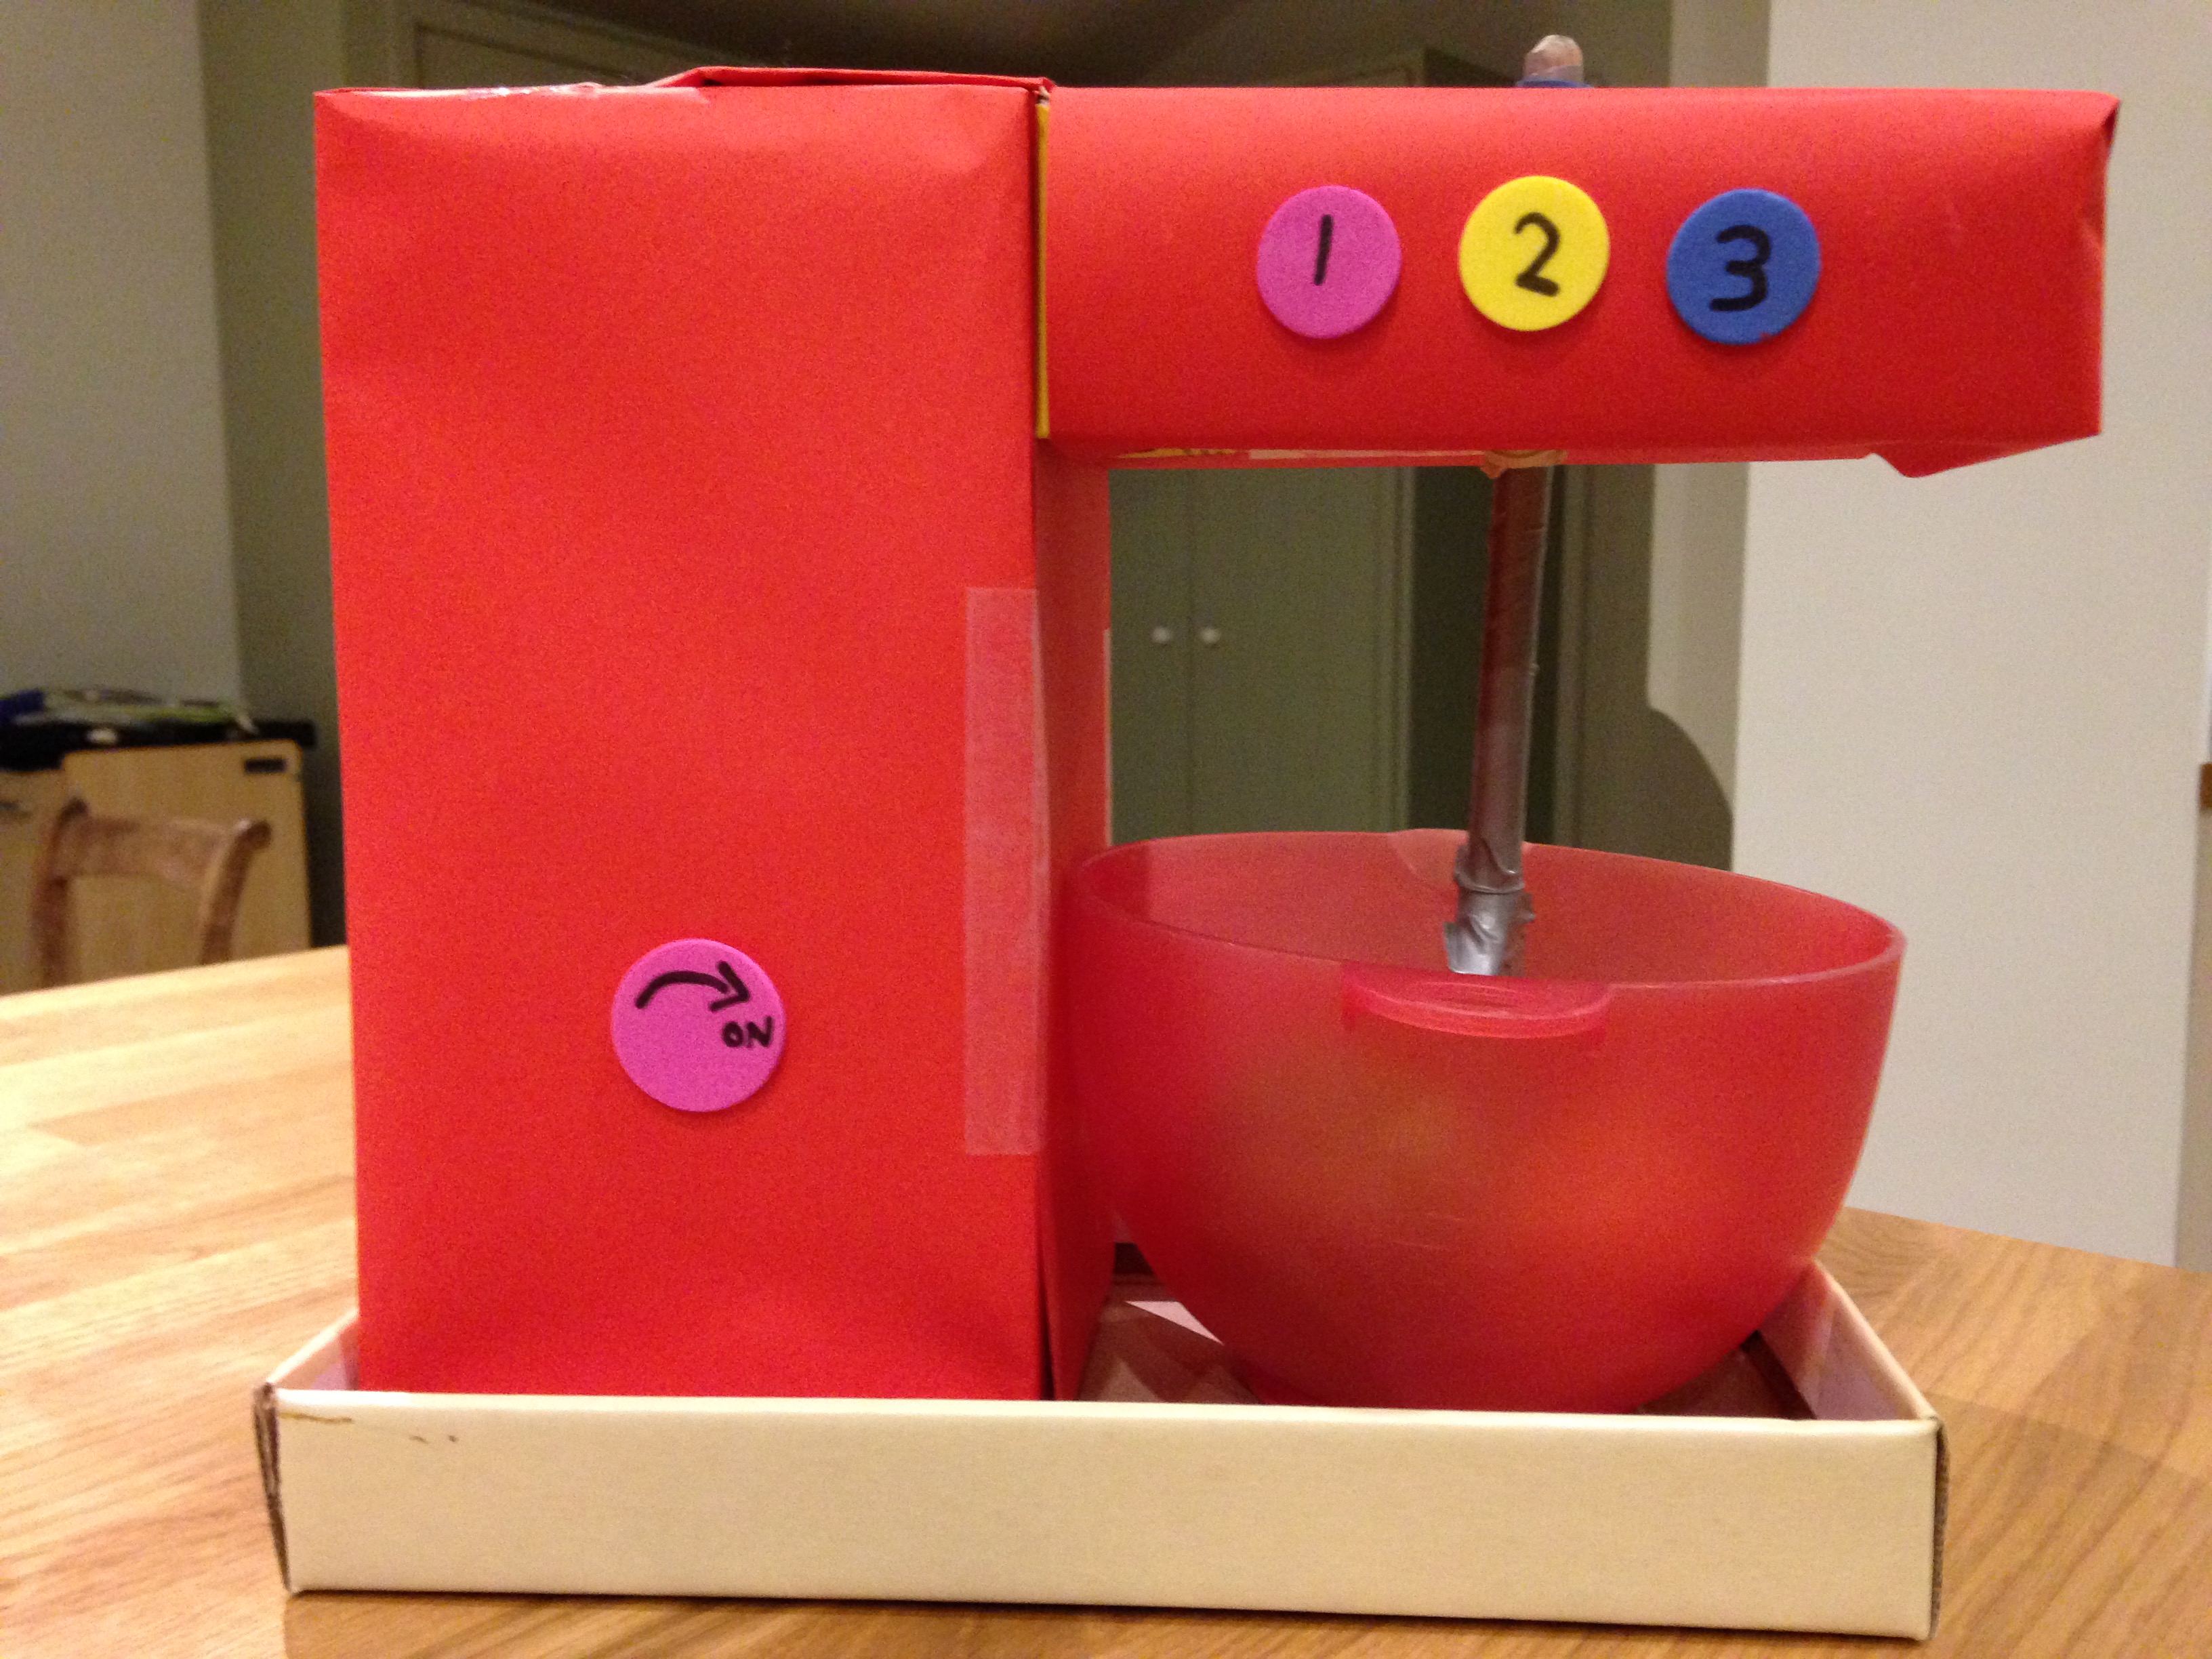
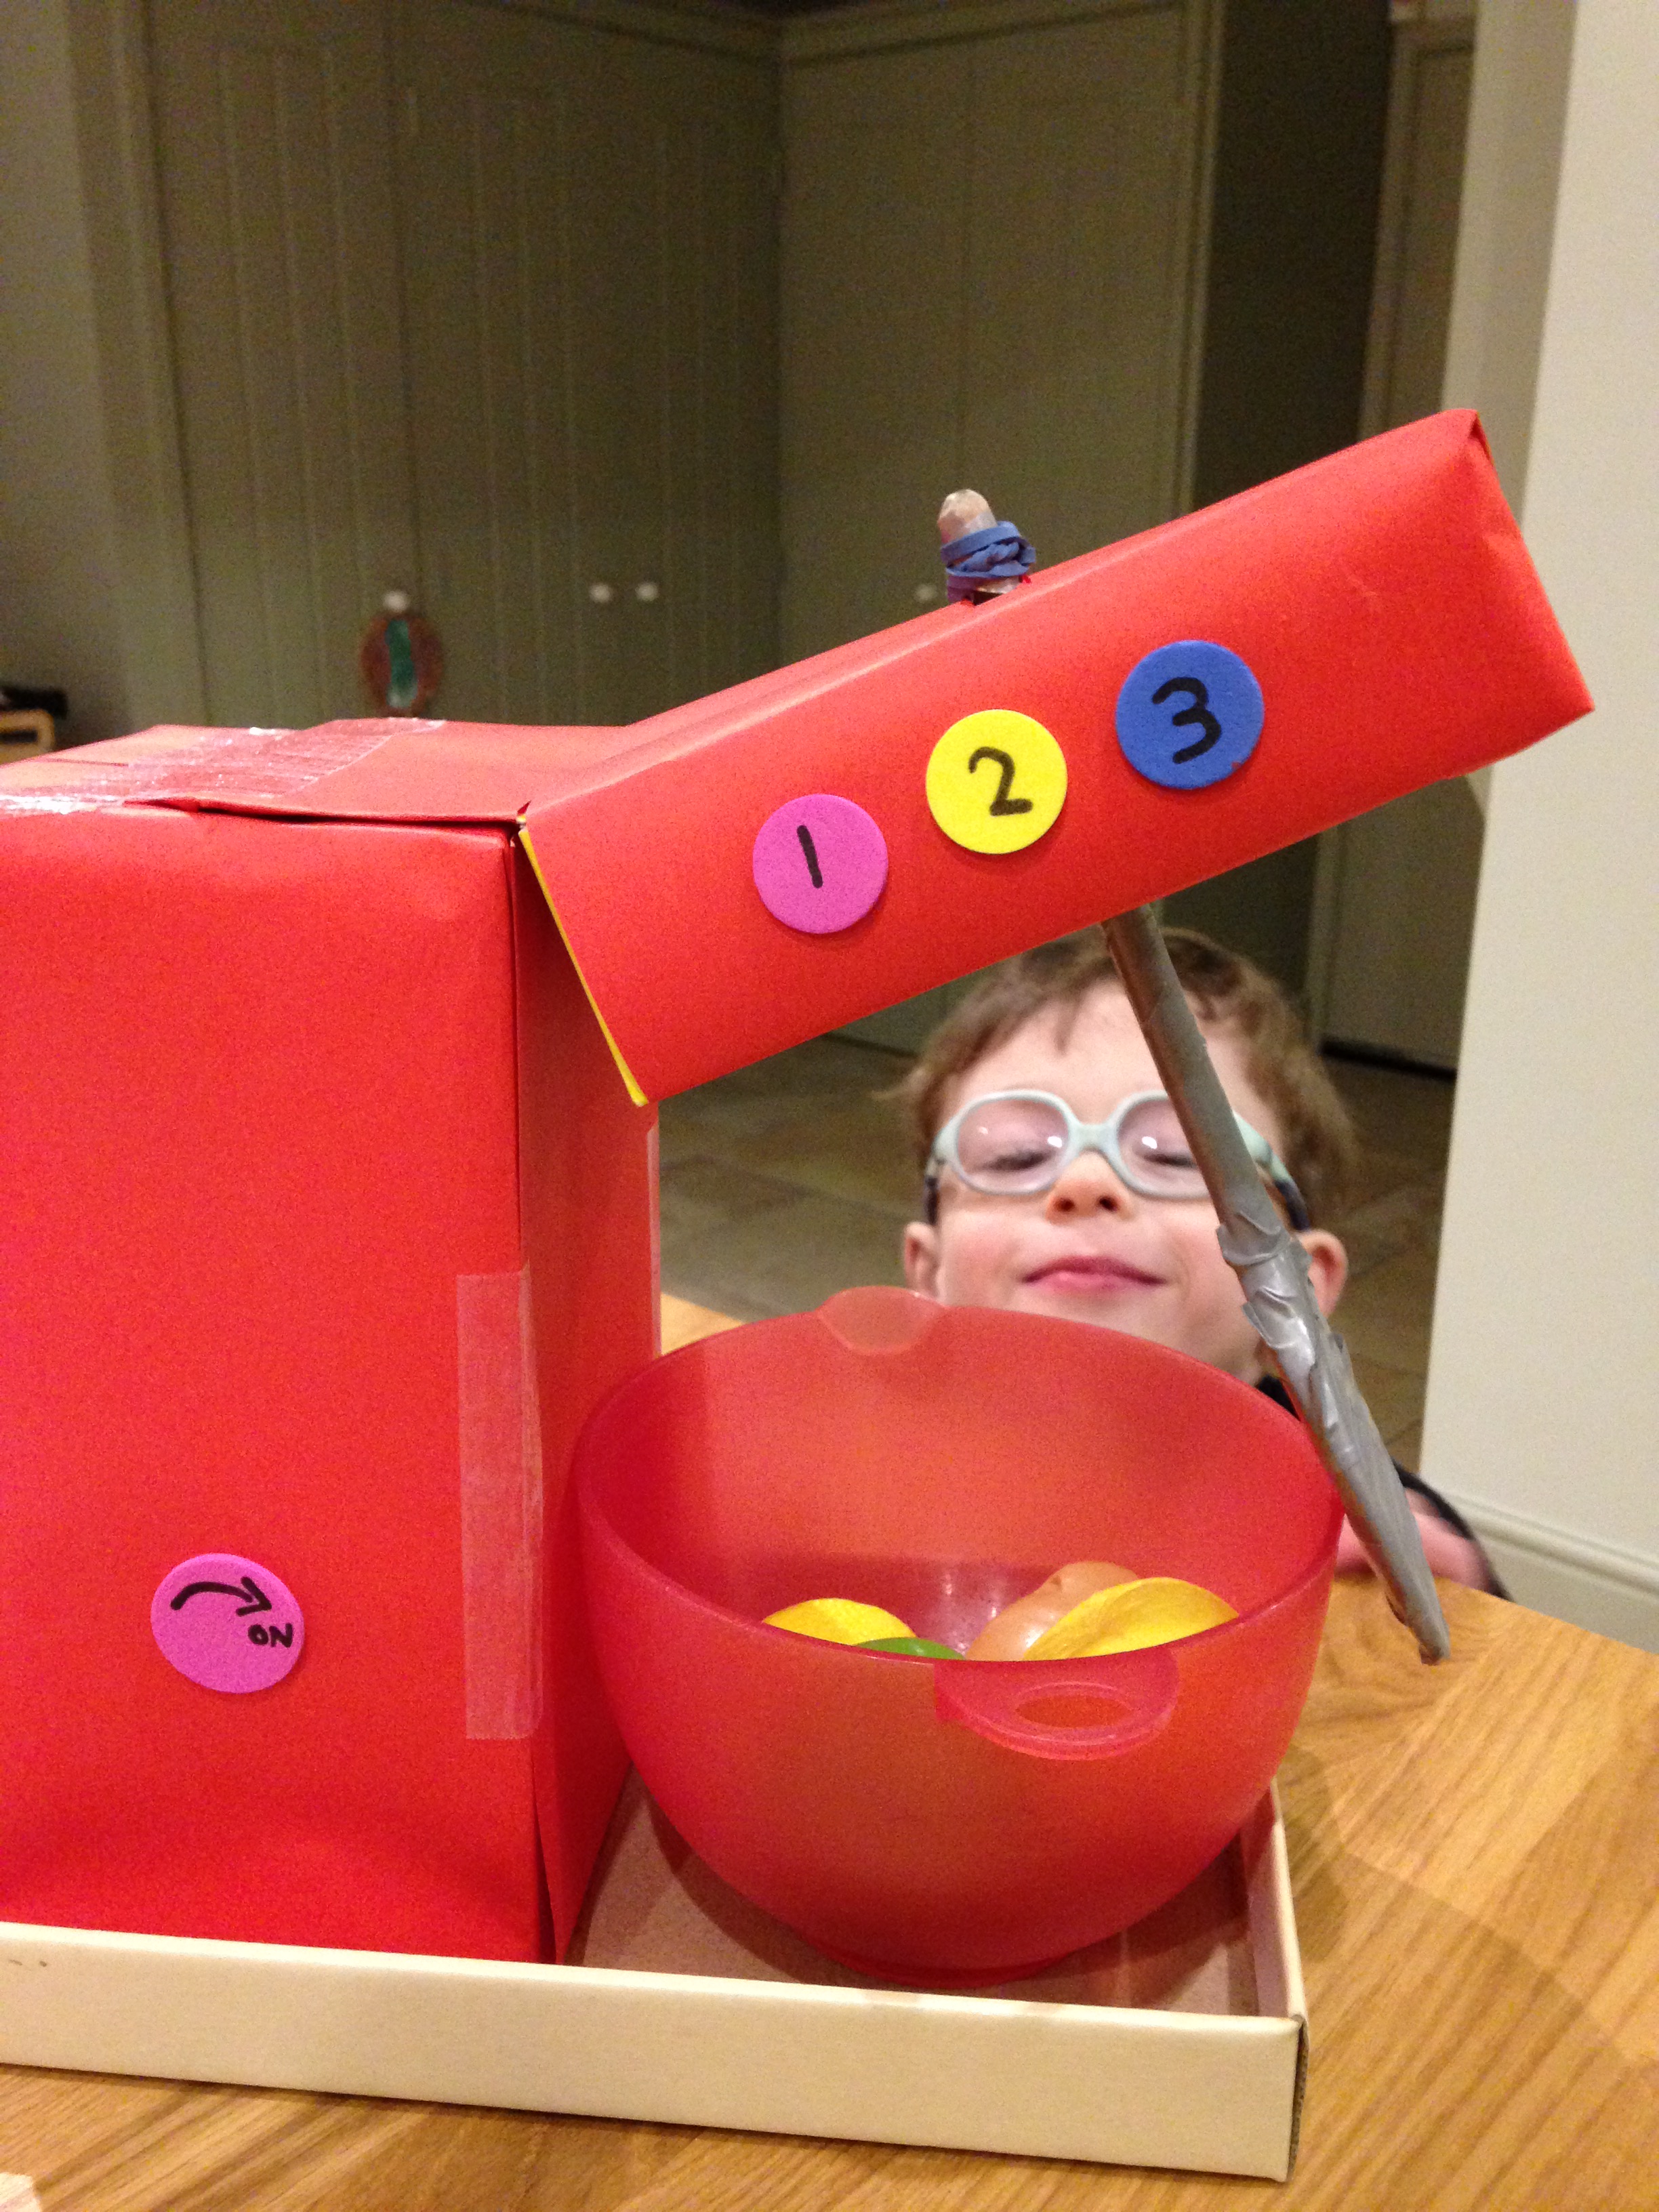
I’ve always wanted a swanky food mixer and now we’ve got one thanks to Eddie’s imagination. What’s more, the spoon rotates and the arm of the mixer lifts up. Plastic vegetable soup, anyone?
What we used
- Shoebox lid for base
- Random box for body of mixer
- Cereal-bar box for arm of mixer
- Wooden spoon
- Coloured paper
- Two elastic bands
- Plastic bowl
- Foam stickers
- Sticky tape, glue, and silver electrical tape or duct tape (not essential
- How we made it
- Cover boxes with coloured paper, using separate bit of paper for the hinge (lid of cereal-bar box) so that it lifts up easily.
- Attach boxes together by taping the lid/hinge of the cereal-bar box to the larger box.
- Glue the large box to the underside of the shoebox lid.
- Cut a hole through the cereal-bar box (we used craft knife) and slide handle of wooden spoon in. We wrapped two elastic bands round the handle, one either side of cereal-bar box, to help keep it in place.
- We wrapped the wooden spoon in silver tape to give it a metal look.
- Decorate the boxes with foam stickers for buttons.

Way to go, Eddie. Toys are fine but useful tools in the kitchen are great. Love Granny!
LikeLike
Terrific. I wish I had one.
LikeLike
Absolutely fantastic! What a joy to see such such a creative little fella. Xx
LikeLike